
How to Register a Private Limited Company in India: Complete Step-by-Step Guide
Starting a business demands careful navigation through legal structures, regulatory compliance, and government procedures. Specifically, registering a Private Limited Company (Pvt Ltd) in India represents one of the most credible business structures available to entrepreneurs. Therefore, this guide walks you through every essential step, from obtaining Digital Signature Certificates to receiving your Certificate of Incorporation. Moreover, understanding this process empowers you to establish a legally recognized entity that can raise capital, hire employees, and build long-term value.
Private Limited Company Registration: Complete Guide for Indian Entrepreneurs
Why Choose Private Limited Company Structure?
Before diving into registration mechanics, understanding why Pvt Ltd matters proves crucial. First, a Private Limited Company offers limited liability protection—your personal assets remain protected if business debts arise. Second, this structure enables access to institutional funding from investors, venture capitalists, and financial institutions seeking organized corporate entities. Third, Pvt Ltd companies demonstrate credibility to customers, suppliers, and partners through formal corporate governance. Additionally, this structure allows easy transfer of ownership through share transfers. Furthermore, the company enjoys perpetual succession—it continues even if founders leave.
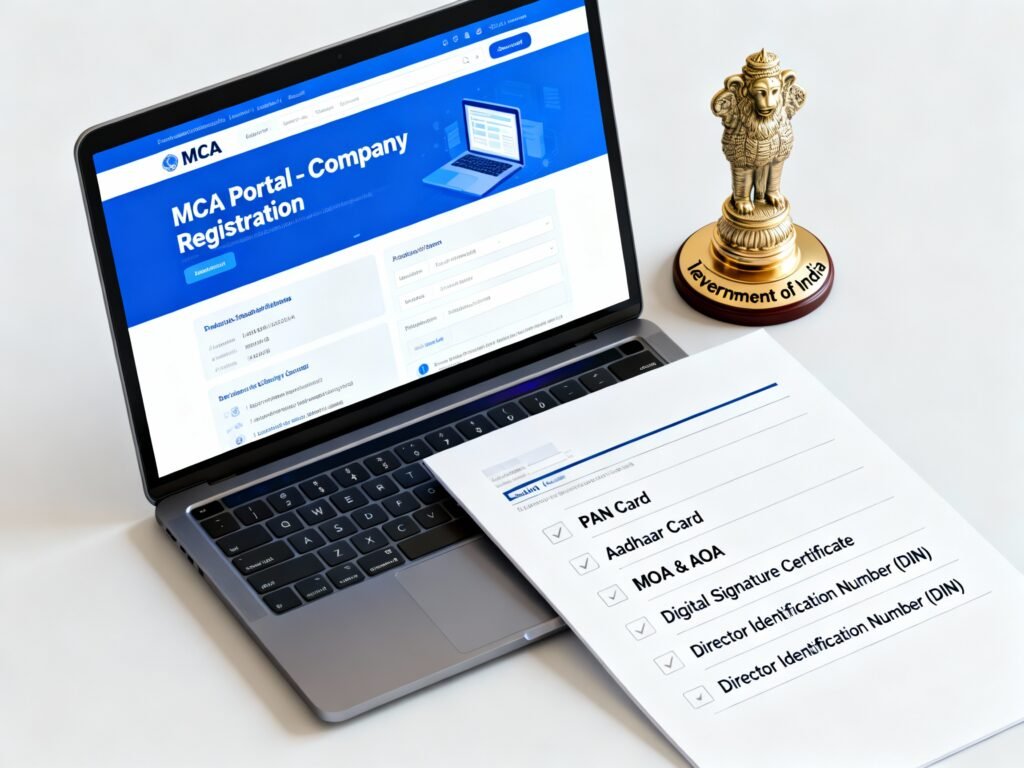
Step 1: Obtain Digital Signature Certificate (DSC)
Every director and shareholder must secure a Digital Signature Certificate from government-authorized certifying agencies. Therefore, this becomes your first actionable step. DSC requirements mandate Class 3 category certificates for electronic document signing.
Key Information Needed:
- Passport-sized photograph
- PAN (Permanent Account Number)
- Aadhaar Card
- Proof of address (recent utility bill)
- Email address and phone number
Timeline and Cost: Completion occurs within 2-3 working days, with costs ranging from ₹1,000-₹2,500 depending on the certifying authority. Popular agencies include eMudhra, Sify, and nCodes. Additionally, you can expedite orders for rush processing.
Step 2: Apply for Director Identification Number (DIN)
Subsequently, every proposed director must obtain a Director Identification Number (DIN) from the Ministry of Corporate Affairs. Therefore, this unique identifier registers your directorship across all future corporate endeavors.
DIN Application Process:
- Download Form DIR-3 from the MCA website
- Digitally sign the form with your DSC
- Attach identity proof (PAN, Aadhaar, Passport)
- Upload to the MCA portal at www.mca.gov.in
- Pay the application fee of ₹500 per director
Approval Timeline: Typically, DIN approval occurs within 1-2 weeks. Importantly, the DIN remains permanent throughout your directorship lifecycle across unlimited companies.
Step 3: Reserve Your Company Name
Now, reserve a unique company name through the SPICe+ Part A form. Consequently, name availability checks ensure no existing company claims your chosen business identity.
Name Reservation Guidelines:
- Must comply with Companies Act 2013 and Companies (Incorporation) Rules 2014
- Should avoid plurals, altered letter cases, or similar translations
- Cannot use restricted terms (“Bank,” “Insurance”) without specific approvals
- Requires minimum three character minimum
- Cannot be offensive or contrary to public policy
Process: Submit SPICe+ Part A through MCA e-Services portal. Approval typically occurs within 7-10 days. Additionally, the name remains reserved for 180 days, providing adequate incorporation window.
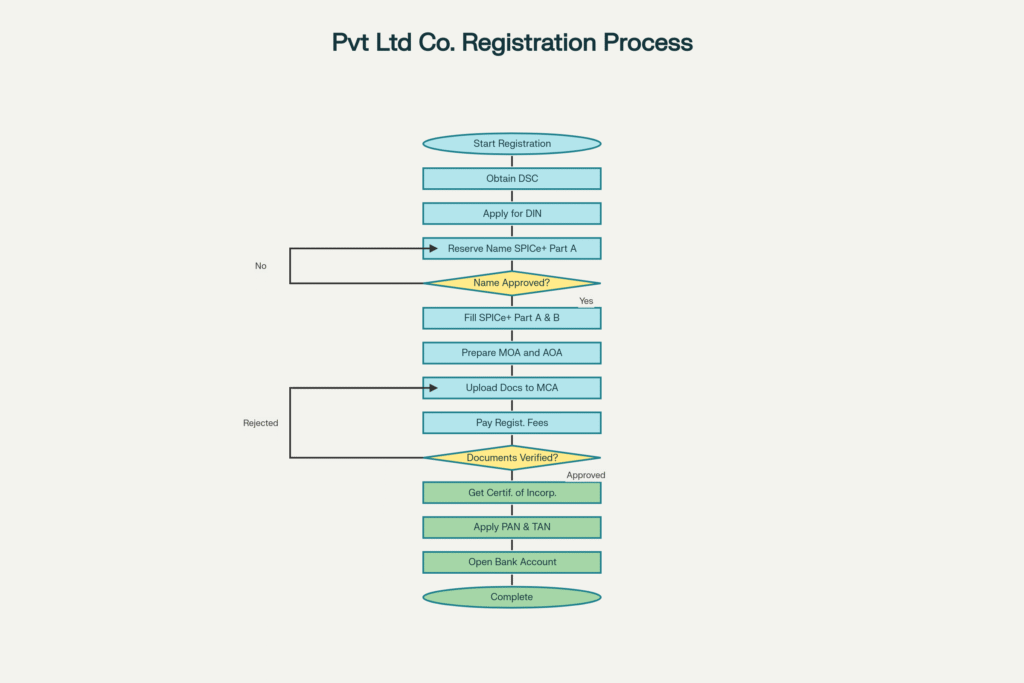 Complete Private Limited Company registration process in India showing 10 key steps from DSC obtainment through bank account opening Checkout Our Latest Services
Step 4: Complete SPICe+ Registration Form
Following name approval, fill the comprehensive SPICe+ Part B form, which consolidates all company incorporation details into one unified document.
Information Required in SPICe+ Part B:
Company Details:
- Authorized capital amount
- Registered office address with complete documentation
- Industrial classification and business activities
Subscriber and Director Information:
- Director names, addresses, occupations
- Shareholding percentages
- Contact details for all parties
Attachments Needed:
- Identity proofs (PAN, Aadhaar, Passport)
- Address proofs (utility bills not exceeding two months old)
- Registered office proof documents
Cost: Zero registration fees for companies with authorized capital up to ₹10 lakh. For higher capital, fees scale accordingly based on MCA guidelines.
Step 5: Prepare Memorandum of Association (MOA) and Articles of Association (AOA)
Moreover, prepare crucial constitutional documents defining your company’s governance framework. Specifically, MOA outlines company objectives, capital structure, and powers, while AOA specifies internal operational rules for management, board meetings, and shareholder processes.
MOA Content:
- Company name, registered state, and authorized capital
- Primary business objectives and scope
- Liability limitation clause
- Subscriber information
AOA Content:
- Director appointment and removal procedures
- Board meeting protocols and voting rights
- Dividend distribution mechanisms
- Statutory compliance procedures
Critical Note: Both documents require digital signatures from all subscribers and a professional (Chartered Accountant, Company Secretary, Advocate, or Cost Accountant). Therefore, coordinate with qualified professionals before submission.
Step 6: Upload Documents to MCA Portal
Subsequently, log into your MCA e-Services account and upload all compiled documentation. Consequently, the portal organizes documents systematically for regulatory review.
Upload Checklist:
- Digitally signed SPICe+ form
- MOA and AOA documents
- Identity and address proofs
- Registered office proof documents
- Professional certification
Payment: Complete fee payment through online banking, credit/debit cards, or net banking. The system generates receipts immediately.
Step 7: Wait for MCA Approval and Certificate of Incorporation
Following submission, the Registrar of Companies (RoC) reviews your application—typically within 7-10 business days. Therefore, monitor your MCA account for status updates.
Upon Approval, You Receive:
- Certificate of Incorporation (CoI): Legal proof of company existence
- Corporate Identity Number (CIN): Unique company identifier for all future correspondence
- Digital copies: Available on the MCA e-Services portal
Certificate Significance: The CoI marks your company’s official birth—from this moment, your business enjoys legal status as a separate entity.
Step 8: Apply for PAN and TAN
Now, apply for Permanent Account Number (PAN) and Tax Deduction Account Number (TAN)—essential tax identifiers for business operations.
Application Process:
- Download Form 49AA for PAN application
- Fill company details, shareholding information, authorized signatories
- Submit through the Income Tax Department website or offline centers
- Processing typically completes within 10-14 days
Cost: Completely free—no government fees apply.
Step 9: Open a Company Bank Account
Furthermore, open a dedicated company bank account separate from personal finances. Importantly, this maintains financial clarity and ensures regulatory compliance.
Required Documents for Bank Account:
- Certificate of Incorporation (CoI)
- MOA and AOA documents
- PAN certificate
- Company seal (obtain from stationery vendors, typically ₹500-₹1,500)
- Director identification documents and residence proofs
Timeline: Most banks approve corporate accounts within 2-5 business days after document verification.
Step 10: Register for GST, EPFO, and ESIC (If Applicable)
Finally, complete post-incorporation registrations ensuring full regulatory compliance.
GST Registration: Required if annual turnover exceeds ₹40 lakh (₹10 lakh for services). Apply through the GST portal within 30 days of incorporation.
EPFO Registration: Mandatory if you employ workers. Helps manage employee provident fund contributions.
ESIC Registration: Required if you have more than 20 employees, managing employee state insurance.
Cost Breakdown: Investment Required
Understanding total expenditure helps budget appropriately. Here’s a realistic cost breakdown:
| Item | Cost (₹) |
|---|---|
| DSC (per director) | 1,000-2,500 |
| DIN Application (per director) | 500 |
| MCA Registration Fee* | 2,000-5,000 |
| Stamp Duty (varies by state) | 500-1,500 |
| Professional Fees (CA/CS) | 5,000-15,000 |
| MOA/AOA Preparation | 2,000-5,000 |
| Company Seal & Stationery | 500-1,500 |
| Bank Account Opening | Free-500 |
| Total Estimated Cost | ₹12,000-₹30,000 |
*Varies by authorized capital
Timeline: Complete Registration Duration
Typically, the entire registration process spans 15-30 days from DSC application through CoI receipt. However, processing times vary based on document completeness and MCA workload.
Common Mistakes to Avoid
Avoid These Pitfalls:
- Incomplete or inaccurate SPICe+ forms causing rejection
- Using directors without obtaining DIN first
- Selecting company names violating naming conventions
- Missing professional certification on MOA/AOA documents
- Delayed PAN/TAN applications causing tax compliance issues
- Opening bank accounts before receiving CoI
Conclusion: Your Business Launch Point
Registering a Private Limited Company in India establishes a legitimate, credible business entity. Therefore, following these systematic steps ensures compliance while minimizing errors and delays. Furthermore, this foundation enables future fundraising, employee hiring, and strategic growth.
** Want to Register your Company, Go with StartupMandi, with the best Experience Guarantee
Your entrepreneurial journey begins with proper legal structure. Consequently, invest time in thorough registration today to build a sustainable tomorrow.
- Comprehensive Guide: ClearTax Company Registration
- Government Portal: Ministry of Corporate Affairs
- Fee Details: Bajaj FinServ Registration Costs
Useful Resources and Contact Details
Entrepreneurs seeking additional support can access:
- MCA Official Portal: www.mca.gov.in—direct government resource for all registration forms and guidelines
- eMudhra DSC Services: Digital Signature Certificate authority
- Income Tax Portal: www.incometax.gov.in for PAN/TAN applications
- GST Portal: www.gst.gov.in for goods and services tax registration
- State ROC Offices: Registrar of Companies offices for post-incorporation queries